



flex circuit board
Flex circuit boards, also known as flexible printed circuit boards (PCBs), are essential components in modern electronics, offering flexibility and versatility in design and application. Flex PCBs are ideal for use in devices where space is limited or where the circuitry needs to conform to a particular shape or contour. Flexing a circuit board requires careful consideration and technique to avoid damage to the components and ensure proper functionality. In this article, we will explore the steps and best practices for flexing circuit boards effectively.
Before attempting to flex a circuit board, it is crucial to understand its design and limitations. Flex PCBs are typically made of thin, flexible substrate materials such as polyimide (PI) or polyester (PET), which allows them to bend without breaking. However, excessive bending or flexing beyond the board’s capabilities can lead to damage to the traces, vias, and components, resulting in malfunction or failure of the circuit.
The first step in flex circuit board is to identify the areas where bending or flexing is required. This may involve studying the design drawings or schematics to understand the layout of the circuitry and any specific requirements for flexibility. Once the flexible areas are identified, it is essential to ensure that the board is free from any obstructions or constraints that could impede bending.
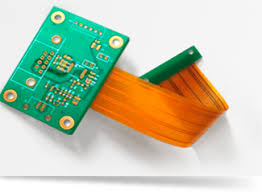
How to flex circuit board
When flexing a circuit board, it is crucial to apply gradual and uniform pressure to avoid placing undue stress on the components or traces. Using too much force or bending the board too sharply can cause damage, such as cracking of the substrate or delamination of the copper traces. Instead, gently flex the board along the desired axis, supporting it evenly to distribute the stress across the entire surface.
In some cases, it may be necessary to pre-condition the flex PCB before bending to improve its flexibility and prevent damage. This can be done by gently bending the board back and forth along the desired flex axis several times to “work” the material and reduce its stiffness. However, caution must be exercised to avoid over-flexing, which can weaken the material and compromise its integrity.
It is also essential to consider the environmental conditions in which the flex PCB will operate. Extreme temperatures, humidity, or mechanical stress can affect the performance and reliability of the circuit board, so it is essential to test the board under simulated operating conditions to ensure its suitability for the intended application.
After flexing the circuit board, it is essential to inspect it carefully for any signs of damage or stress. This includes visually inspecting the traces, vias, and components for cracks, delamination, or other signs of mechanical failure. Additionally, electrical testing may be required to ensure that the circuit functions correctly after flexing.
In conclusion, flexing a circuit board requires careful planning, technique, and consideration of the board’s design and limitations. By following the steps outlined in this article and exercising caution to avoid excessive stress or damage, it is possible to flex circuit boards effectively while maintaining their integrity and functionality.
